What a boring title! I know! but it is what it is. The idea is to work on a remote server, using the Python packages installed there, but as snappy as if you were working in your local machine; very convenient specially when your workflow requires graphic visualization, your local machine does not have the required resources, or you simply want to have everything in one place and work from anywhere.
We will set up our server and local Linux machines using Conda and JupyterLabs. Then we will install Pyiron, an IDE for computational materials science, which installs also other useful packages like the Atomic Simulation Environment (ASE), and Pymatgen. As I am computational chemist, these are the packages I am using for this example, but obviously this method would work for any package you would like to work with, including the typical ones used for Machine Learning.
As managing different Python versions and environments can be a real pain, we will use a package and environment management system to ease the pain. We are going to use Conda, but other options are also available like Poetry.
Let’s first configure our remote server. You can install Conda in your HOME, so no admin permisions required. For convenience, I create the opt folder where I install the different codes. Feel free to skip this step or use a folder name that better suits you.
~$ mkdir opt
~$ cd opt
Conda has the Anaconda and the Miniconda versions. We are going to use the Miniconda one. The installation of the latest version is pretty easy. First download the installer:
~/opt$ wget https://repo.anaconda.com/miniconda/Miniconda3-latest-Linux-x86_64.shAnd then execute it
~/opt$ sh ./Miniconda3-latest-Linux-x86_64.sh
Now you have to either open a new terminal/session or source your .bashrc file to include the conda path in your PATH, because Conda added few lines to your .bashrc file during the installation (if you allowed it to do it), that need to be executed.
Following the installer sugestions, if you do not want conda to be activated automatically every time you open a new session, you just type
conda config --set auto_activate_base falseCreate the environment for computational chemistry with Python 3, that we are going name compchem, where we will install the required packages.
conda create -n compchem python=3Next, we use conda to activate our brand new environment and install Pyiron in there.
~$ conda activate compchem
(compchem) ~$ conda install -c conda-forge pyiron
The installation of pyrion installs ASE, Pymatgen, alongside SciPy, NumPy, Matplotlib, Pandas, etc. This is all managed by conda, and as it is being run in our virtual environment, it will not clash with any other versions installed in the system. Note that when we create the environment with python3, it installs Python 3.10, but when we tell conda to install Pyiron, at the time of writing, it requires Python 3.9, so it will downgrade the Python version of the virtual environment, and you do not have to do anything.
Now it is time to install JupyterLab, also with conda. We just need to type:
(compchem) ~$ conda install -c conda-forge jupyterlabFor Pyiron to visualize structures on JupyterLab, we need an extra step and install NGLView, which needs nodejs
(compchem) ~$ conda install -c conda-forge nodejs nglview
(compchem) ~$ jupyter labextension install @jupyter-widgets/jupyterlab-manager --no-build
(compchem) ~$ jupyter labextension install nglview-js-widgets
Hopefully everything went well up to this point, so you have your server configured and ready to run an instance of JupyterLab, with Pyiron installed, and capable of visualizing structures using NGLView.
To work on the remote server using the browser in your local machine, you have to create a tunel connection from a port of your local machine to a port of the server. Then on the server side, you open an instance of JupyterLab, without an associated browser, over the port you have just mapped to your localhost.
Long story short, to open an instance of JupyterLab without a browser on the port 9000 on your remote server run:
(compchem) ~/calc$ jupyter-lab --port=9000 --no-browser &And in your local machine map the port 8888 of your localhost to the port 9000 of your remote server:
ssh -N -f -L 8888:localhost:9000 user@your.remote.server.comNow, open a browser in your localmachine and in the address bar type localhost:8888 . As you just created a tunel connection that maps both ports, it should open the instance of the JupyterLab of your remote server in your local browser.
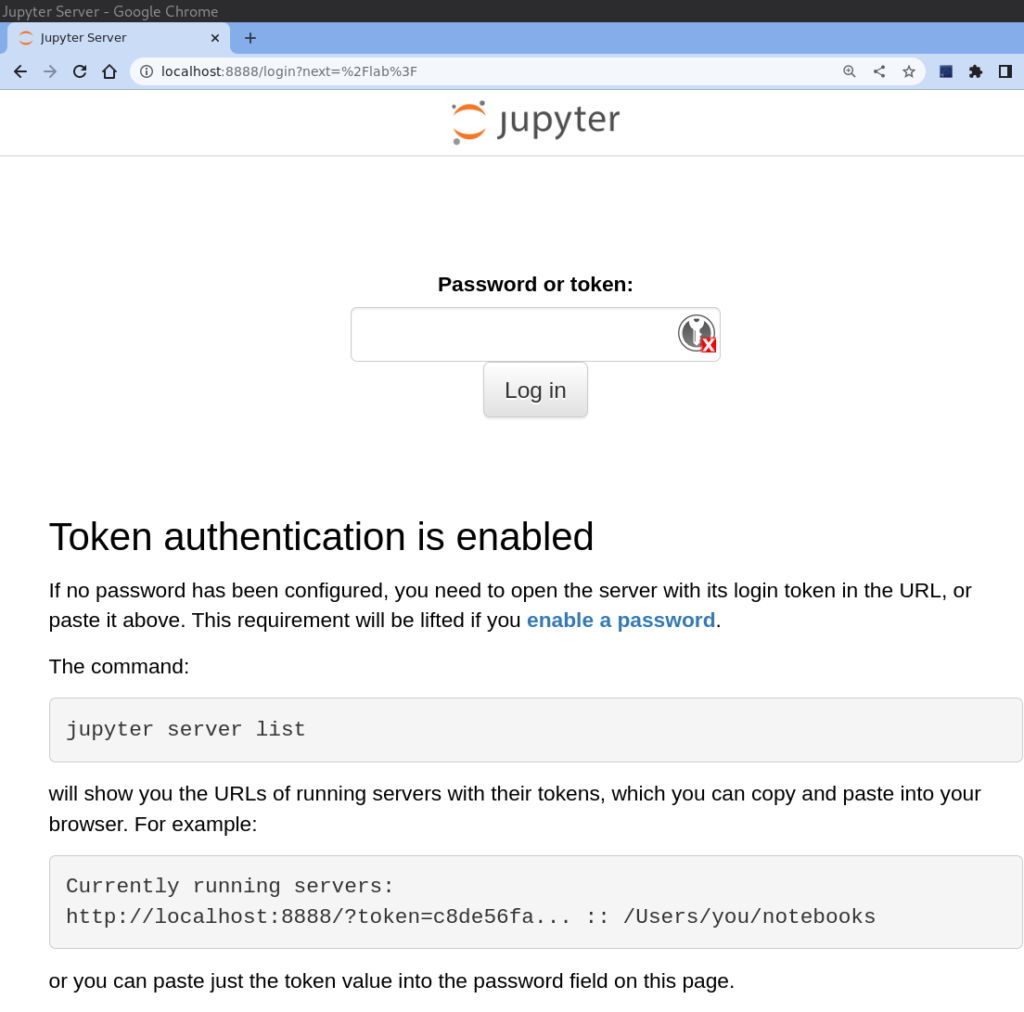
We are almost there! You may have noticed that it requires a token for you to connect to JupyterLab. Where on Earth is that token? Well, do not panic! When you initiated the JupyterLab instance on your server, it starts printing some messages that most likely you have happily ignored.
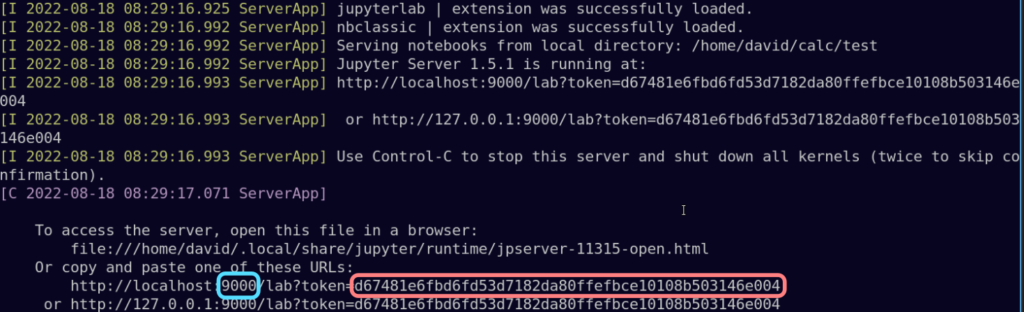
You can either copy the token and paste it in the corresponding field, or you can copy the entire URL and paste it in the address bar of your local browser but changing the port number 9000 (highlighted in blue) to 8888.
If everything went well, you should see something like this below. This is your local browser running JupyterLab on your remote server.
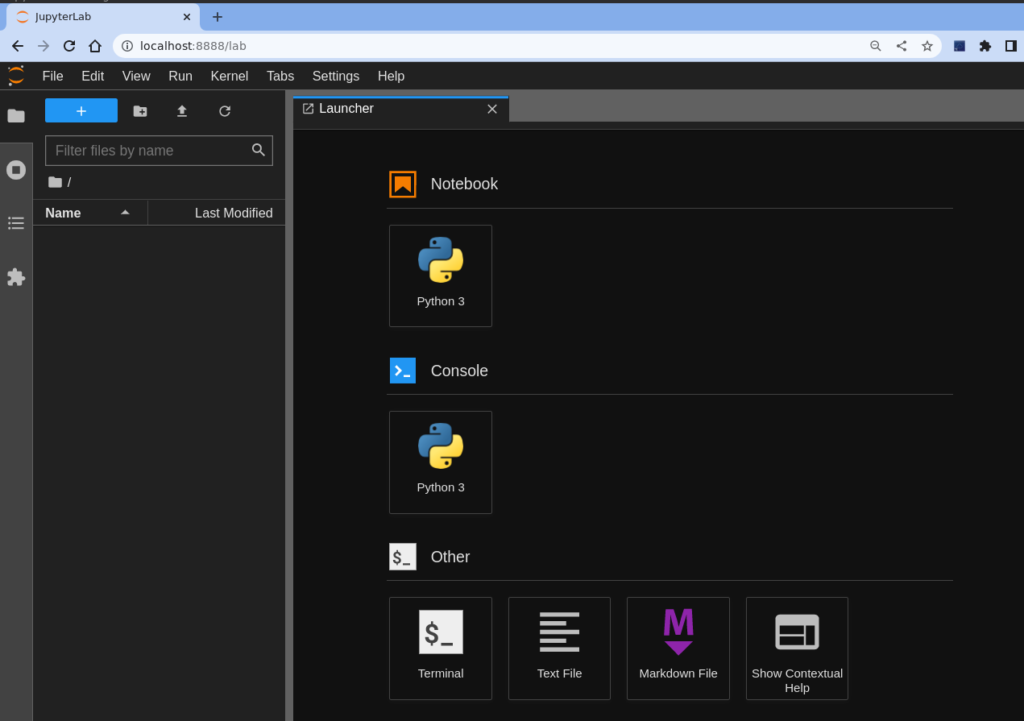
It is time to have some fun, and check that everything is working correctly. So we create a Python 3 notebook, by clicking on the Python3 icon at the very top. Then introduce the following code to create an Al bulk structure and visualize it. Remember that for executing a cell in JupyterLab you need to press Ctrl + Return. Return itself will enter a new line in the current cell.
from pyiron import Project
pr = Project(path='structures')
structure = pr.create.structure.bulk('Al','fcc',4.05)
structure.plot3d()

I guess if you got up to this point is because you really wanted to do it, so I hope you found this useful. If you have any other workflow you want to share or ideas to improve it, please feel free to share it in the comments.